 "The Same Game": A Simple Game from Start to Finish
By Ben Marchant
The View: Drawing Your Game
Now that the document contains an initialized game board object we need to
display this information to the user. This is where we can actually start to
see our game come to life.
The first step is to add code to resize the window
to the correct size. Right now the window is a default size that isn't what
we want. We'll do this in the OnInitialUpdate override. The view class
inherits a default OnInitialUpdate that sets up the view and we want to
override it so that we can resize the window when the view is initially
updated. This can be achieved by opening up the Properties Window from the
CSameGameView header file (which will actually be called SameGameView.h). Do
this by pressing Alt+Enter or from the menu View-> Properties Window (on
some versions of Visual Studio, it will be View-> Other Windows
-> Properties Window). Below is what you'll see in the properties window.

In the screenshot my cursor is hovering over the "Overrides" section; click on it. Look for the OnInitialUpdate option, click on it, click the dropdown as shown in the screenshot below and select "<Add> OnInitialUpdate".

This will add the OnInitialUpdate override to your view with some default code in it to call the CView implementation of the function. Then we just add a call to the ResizeWindow function that we will write. So this leaves us with the following in the header file (changes bolded).
#pragma once

class CSameGameView : public CView
{
protected: // create from serialization only
  CSameGameView();
    DECLARE_DYNCREATE(CSameGameView)

  // Attributes
public:
  CSameGameDoc* GetDocument() const;
  // Overrides
public:
  virtual void OnDraw(CDC* pDC);  // overridden to draw this view
  virtual BOOL PreCreateWindow(CREATESTRUCT& cs);
protected:

  // Implementation
public:

  void ResizeWindow();

  virtual ~CSameGameView();
#ifdef _DEBUG
  virtual void AssertValid() const;
  virtual void Dump(CDumpContext& dc) const;
#endif

  // Generated message map functions
protected:
  DECLARE_MESSAGE_MAP()
public:
  virtual void OnInitialUpdate();
};

#ifndef _DEBUG  // debug version in SameGameView.cpp
inline CSameGameDoc* CSameGameView::GetDocument() const
{ return reinterpret_cast<CSameGameDoc*>(m_pDocument); }
#endif
While we're adding in the resize code, we also need to add drawing code to the CSameGameView class. The header and source files for the view already contain a function override called OnDraw. This is where we'll put the drawing code. Here is the full source code for the view (changes bolded).
#include "stdafx.h"
#include "SameGame.h"

#include "SameGameDoc.h"
#include "SameGameView.h"

#ifdef _DEBUG
#define new DEBUG_NEW
#endif

// CSameGameView
IMPLEMENT_DYNCREATE(CSameGameView, CView)
BEGIN_MESSAGE_MAP(CSameGameView, CView)
END_MESSAGE_MAP()

// CSameGameView construction/destruction
CSameGameView::CSameGameView()
{
}

CSameGameView::~CSameGameView()
{
}

BOOL CSameGameView::PreCreateWindow(CREATESTRUCT& cs)
{
  return CView::PreCreateWindow(cs);
}

// CSameGameView drawing

void CSameGameView::OnDraw(CDC* pDC) // MFC will comment out the argument name by default; uncomment it
{
  //  First get a pointer to the document
  CSameGameDoc* pDoc = GetDocument();
  ASSERT_VALID(pDoc);
  if(!pDoc)
    return;
  //  Save the current state of the device context
  int nDCSave = pDC->SaveDC();
  //  Get the client rectangle
  CRect rcClient;
  GetClientRect(&rcClient);
  //  Get the background color of the board
  COLORREF clr = pDoc->GetBoardSpace(-1, -1);
  //	Draw the background first
  pDC->FillSolidRect(&rcClient, clr);
  //  Create the brush for drawing
  CBrush br;
  br.CreateStockObject(HOLLOW_BRUSH);
  CBrush* pbrOld = pDC->SelectObject(&br);
  //	Draw the squares
  for(int row = 0; row < pDoc->GetRows(); row++)
  {
    for(int col = 0; col < pDoc->GetColumns(); col++)
    {
      //  Get the color for this board space
      clr = pDoc->GetBoardSpace(row, col);
      //  Calculate the size and position of this space
      CRect rcBlock;
      rcBlock.top = row * pDoc->GetHeight();
      rcBlock.left = col * pDoc->GetWidth();
      rcBlock.right = rcBlock.left + pDoc->GetWidth();
      rcBlock.bottom = rcBlock.top + pDoc->GetHeight();
      //  Fill in the block with the correct color
      pDC->FillSolidRect(&rcBlock, clr);
      //  Draw the block outline
      pDC->Rectangle(&rcBlock);
    }
  }
  //  Restore the device context settings
  pDC->RestoreDC(nDCSave);
  br.DeleteObject();
}


// CSameGameView diagnostics
#ifdef _DEBUG
void CSameGameView::AssertValid() const
{
  CView::AssertValid();
}

void CSameGameView::Dump(CDumpContext& dc) const
{
  CView::Dump(dc);
}

//  non-debug version is inline
CSameGameDoc* CSameGameView::GetDocument() const
{
  ASSERT(m_pDocument->IsKindOf(RUNTIME_CLASS(CSameGameDoc)));
  return (CSameGameDoc*)m_pDocument;
}
#endif //_DEBUG

void CSameGameView::OnInitialUpdate()
{
  CView::OnInitialUpdate();

  //  Resize the window
  ResizeWindow();

}


void CSameGameView::ResizeWindow()
{
  //  First get a pointer to the document
  CSameGameDoc* pDoc = GetDocument();
  ASSERT_VALID(pDoc);
  if(!pDoc)
    return;
  //  Get the size of the client area and the window
  CRect rcClient, rcWindow;
  GetClientRect(&rcClient);
  GetParentFrame()->GetWindowRect(&rcWindow);
  //  Calculate the difference
  int nWidthDiff = rcWindow.Width() - rcClient.Width();
  int nHeightDiff = rcWindow.Height() - rcClient.Height();
  //  Change the window size based on the size of the game board
  rcWindow.right = rcWindow.left +
    pDoc->GetWidth() * pDoc->GetColumns() + nWidthDiff;
  rcWindow.bottom = rcWindow.top +
    pDoc->GetHeight() * pDoc->GetRows() + nHeightDiff;
  //  The MoveWindow function resizes the frame window
  GetParentFrame()->MoveWindow(&rcWindow);
}
It is very simple to draw the game board, we are just going to loop through each row, column by column, and draw a colored rectangle. There is one argument to the OnDraw function and that is a CDC pointer. The CDC class is the base class for all device contexts. A device context is the generic interface to a device such as the screen or a printer. Here we'll use it to draw to the screen.
We first start the function by getting a pointer to the document so that we can get the board information. Next we call the SaveDC function from the device context. This function saves the state of the device context so that we can restore it after we are done.
//  Get the client rectangle
CRect rcClient;
GetClientRect(&rcClient);
//  Get the background color of the board
COLORREF clr = pDoc->GetBoardSpace(-1, -1);
//  Draw the background first
pDC->FillSolidRect(&rcClient, clr);
Next we need to color the background of the client area black so we get the dimensions of the client area by calling GetClientRect. A call to GetBoardSpace(-1,-1) on the document will return the background color and FillSolidRect will fill the client area with that background color.
//  Create the brush for drawing
CBrush br;
br.CreateStockObject(HOLLOW_BRUSH);
CBrush* pbrOld = pDC->SelectObject(&br);

...

//  Restore the device context settings
pDC->RestoreDC(nDCSave);
br.DeleteObject();
Now it is time to draw the individual rectangles. This is accomplished by drawing a colored rectangle and then drawing a black outline around it. We now have to create a brush object to do the outline. The type of brush we are creating, HOLLOW_BRUSH, is called hollow because when we draw a rectangle MFC will want to fill in the middle with some pattern. We don't want this so we'll use a hollow brush so that the previously drawn colored rectangle will show through. Creating a brush allocates GDI memory that we have to later delete so that we don't leak GDI resources.
//  Draw the squares
for(int row = 0; row < pDoc->GetRows(); row++)
{
  for(int col = 0; col < pDoc->GetColumns(); col++)
  {
    //  Get the color for this board space
    clr = pDoc->GetBoardSpace(row, col);
    //  Calculate the size and position of this space
    CRect rcBlock;
    rcBlock.top = row * pDoc->GetHeight();
    rcBlock.left = col * pDoc->GetWidth();
    rcBlock.right = rcBlock.left + pDoc->GetWidth();
    rcBlock.bottom = rcBlock.top + pDoc->GetHeight();
    //  Fill in the block with the correct color
    pDC->FillSolidRect(&rcBlock, clr);
    //  Draw the block outline
    pDC->Rectangle(&rcBlock);
  }
}
The nested for loops are very simple, they iterate row by row, column by column, getting the color of the corresponding board space from the document using the GetBoardSpace function from the document, calculating the size of the rectangle to color and then drawing the block. The drawing uses two functions, FillSolidRect() to fill in the colored portion of the block and Rectangle() to draw the outline of the block. This is what draws all of the blocks in the client area of our view.
The last function that we've inserted into the view is one to resize the window based on the dimensions of the game board. In later articles we'll allow the user to change the number of blocks and size of the blocks so this function will come in handy then too. Again we start by getting a pointer to the document followed by getting the size of the current client area and the current window.
//  Get the size of the client area and the window
CRect rcClient, rcWindow;
GetClientRect(&rcClient);
GetParentFrame()->GetWindowRect(&rcWindow);
Finding the difference between these two gives us the amount of space used by the title bar, menu and borders of the window. We can then add the differences back onto the size of the desired client area (# of blocks by # of pixels per block) to get the new window size.
//  Calculate the difference
int nWidthDiff = rcWindow.Width() - rcClient.Width();
int nHeightDiff = rcWindow.Height() - rcClient.Height();
//  Change the window size based on the size of the game board
rcWindow.right = rcWindow.left +
  pDoc->GetWidth() * pDoc->GetColumns() + nWidthDiff;
rcWindow.bottom = rcWindow.top +
  pDoc->GetHeight() * pDoc->GetRows() + nHeightDiff;
//  The MoveWindow function resizes the frame window
Finally the GetParentFrame function returns a pointer to the CMainFrame class that is the actual window for our game and we resize the window by calling MoveWindow.
GetParentFrame()->MoveWindow(&rcWindow);
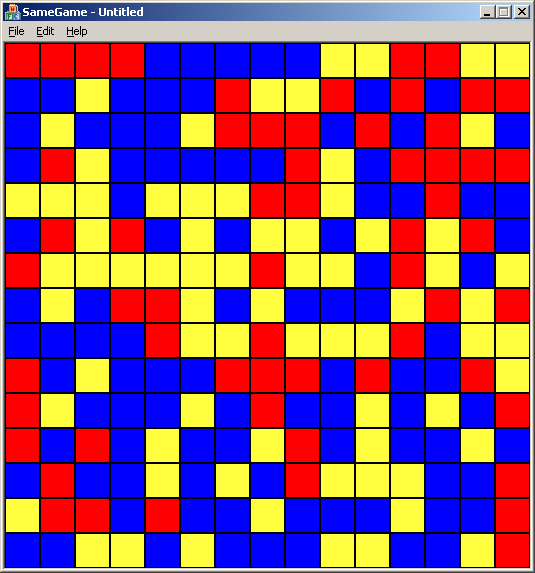
Your game should now look similar to this:
Conclusion
In this article we've gone over some of the basics of the Microsoft Foundation Classes and the Document/View architecture that it provides. We've assembled a game board object that contains our game data and constructed a view that renders the data to the user. In our next article we'll go over event driven programming, respond to events from the user such as mouse clicks and finish up with a "playable" version of our game.
Source Code from Part 1
Continue to Part 2: Creating a Playable
Game
